
DIY Industrial Shelving Tutorial/ BLACK+DECKER Drill Giveaway
/Happy Monday! I'm starting a petition to extend Summer weekends. Who's signing?
Today's post is exciting. A tutorial AND a giveaway for a BLACK+DECKER Autosense drill. Oooo.
Our weather was actually kind of glum here in ol' Iowa this weekend. The downer weather gave us time to tackle a project in our office. Once we added our card catalog cabinet to the office, my recent art purchase didn't make sense. But industrial shelving totally did. Nate and Ike agreed.
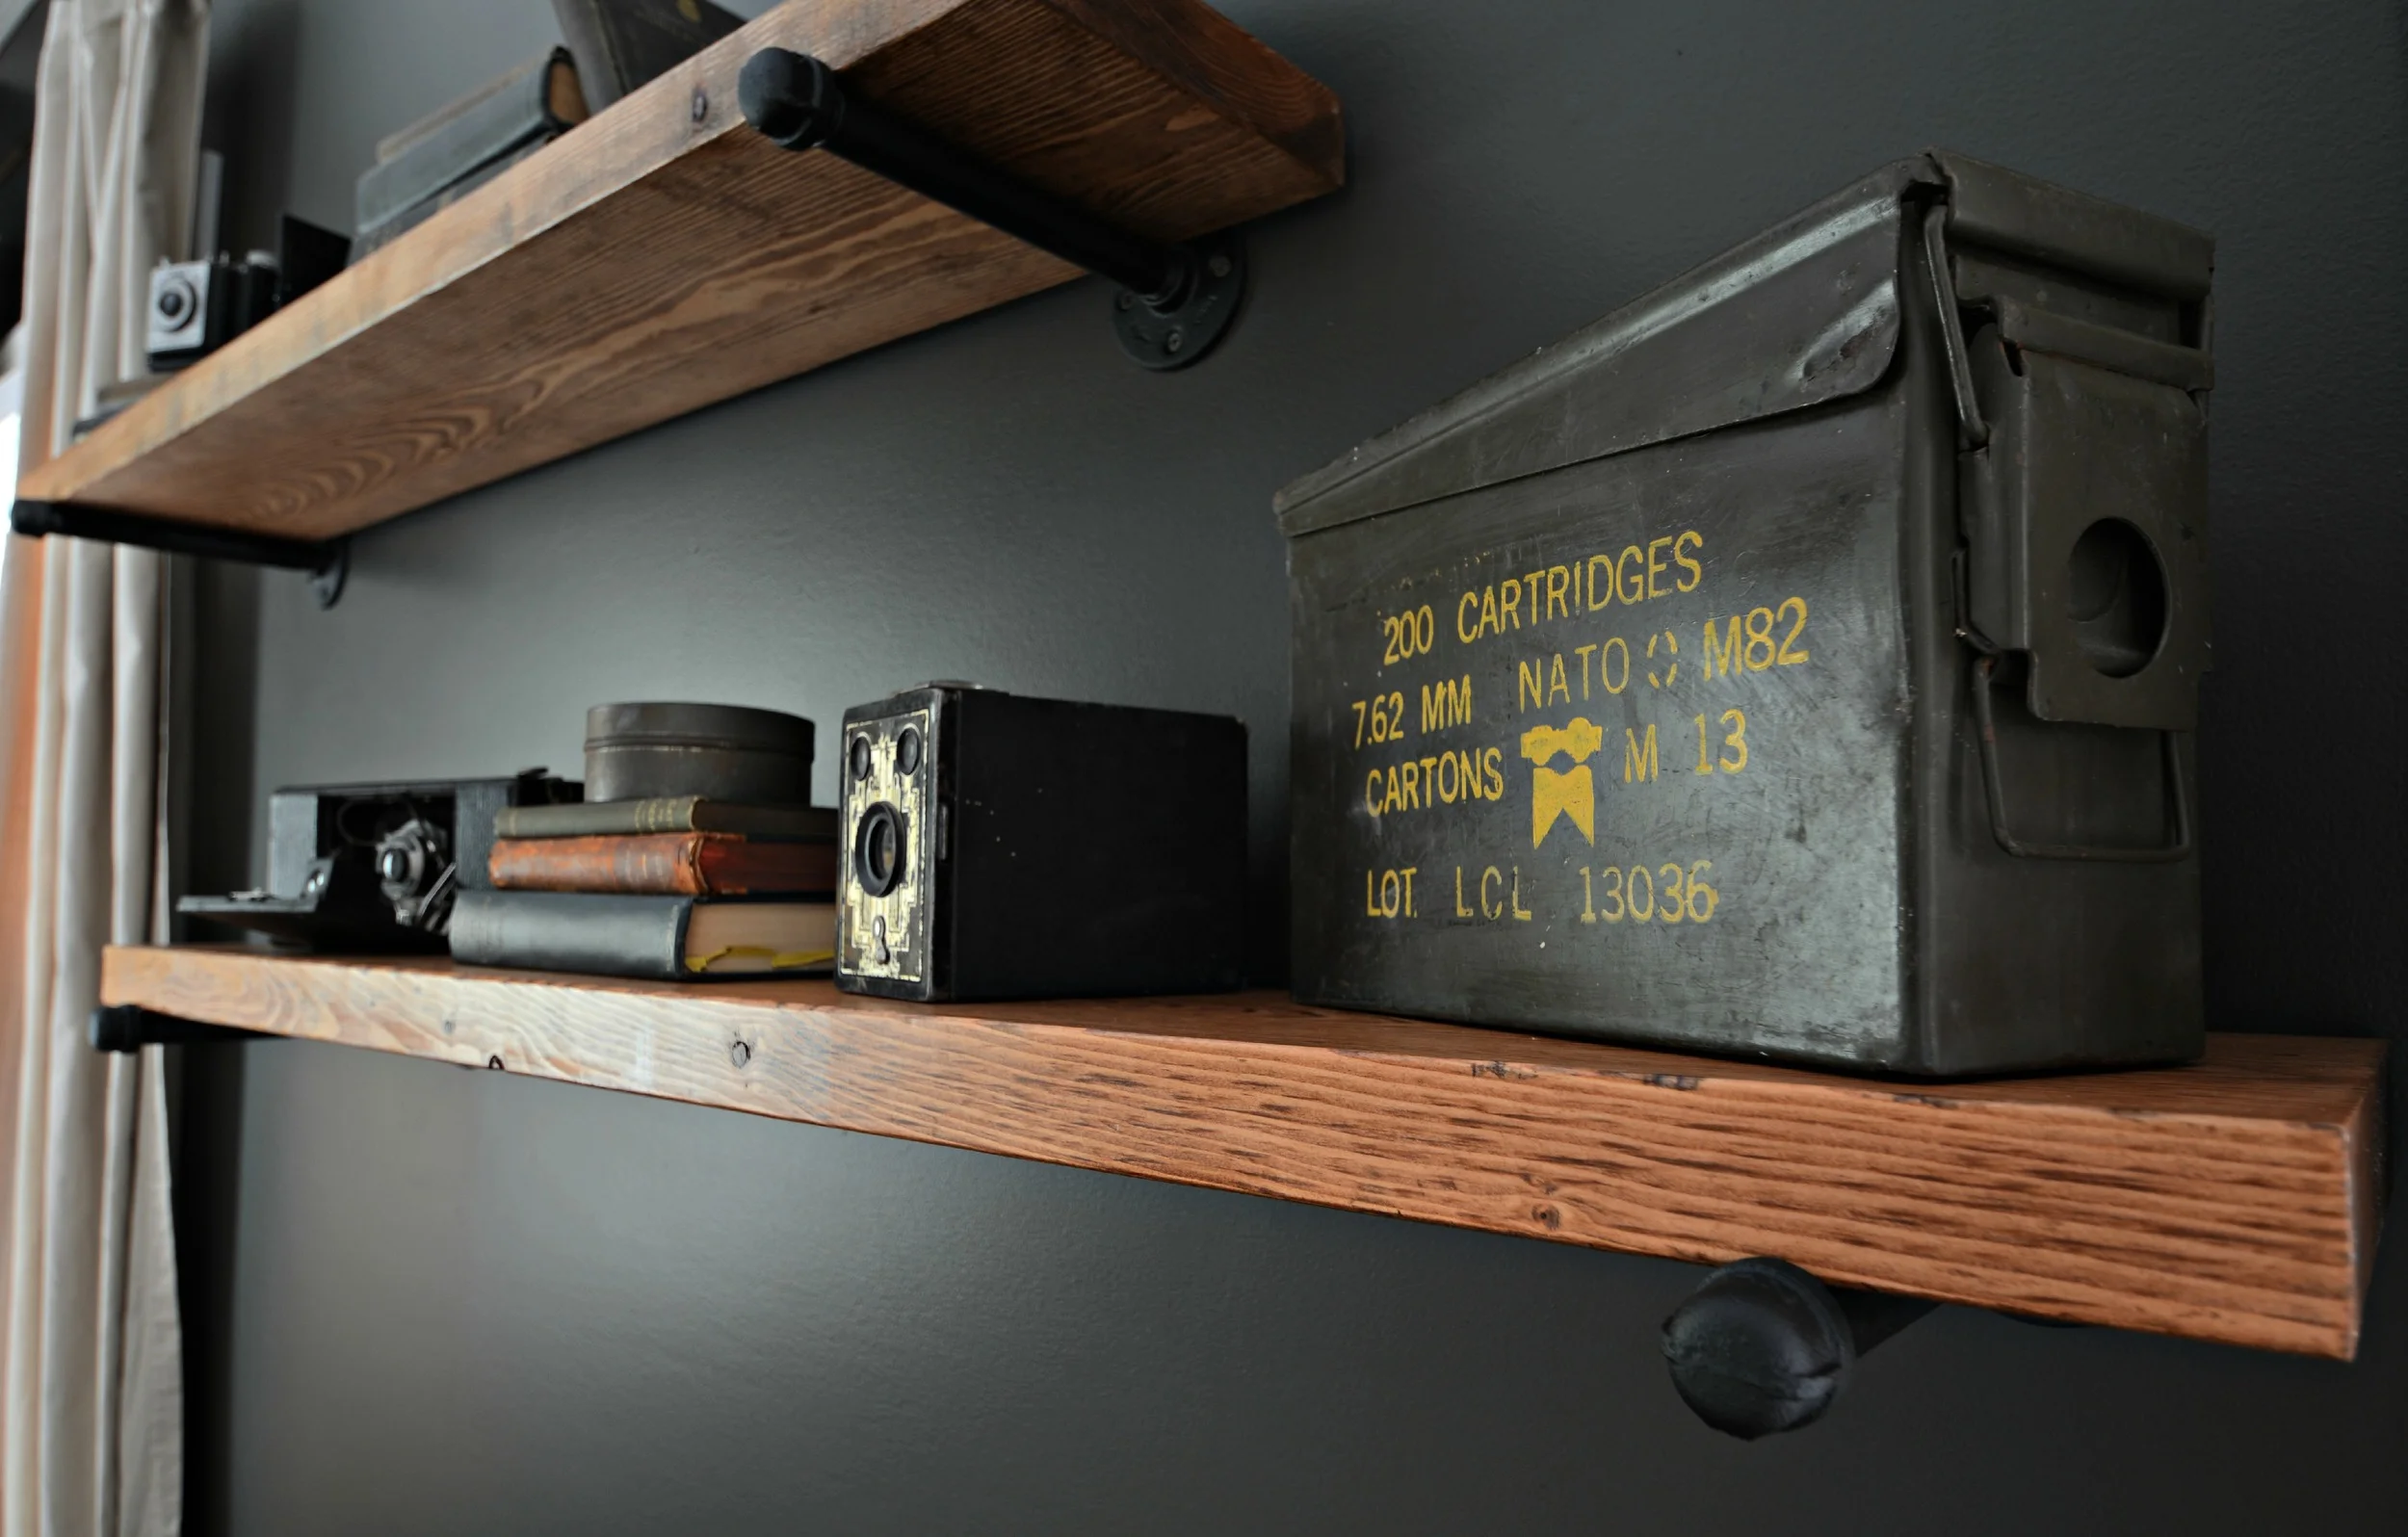


I had previously seen these Restoration Hardware inspired shelves around the blogosphere. I can't tell exactly whose tutorial was first. We just wung it. That's how we roll at Decor and the Dog. They're a super basic design and can be easily completed in a couple of hours (darn drying time).
We first grabbed a 2'x8' board. We cut it down to two 45" pieces. We then stained/poly'd the boards. (We used Minwax Early American for the stain.)
Nate then cut some 1/2" black iron pipe to 8" and used his fancy new pipe threader to build the pipe portion of our shelves.
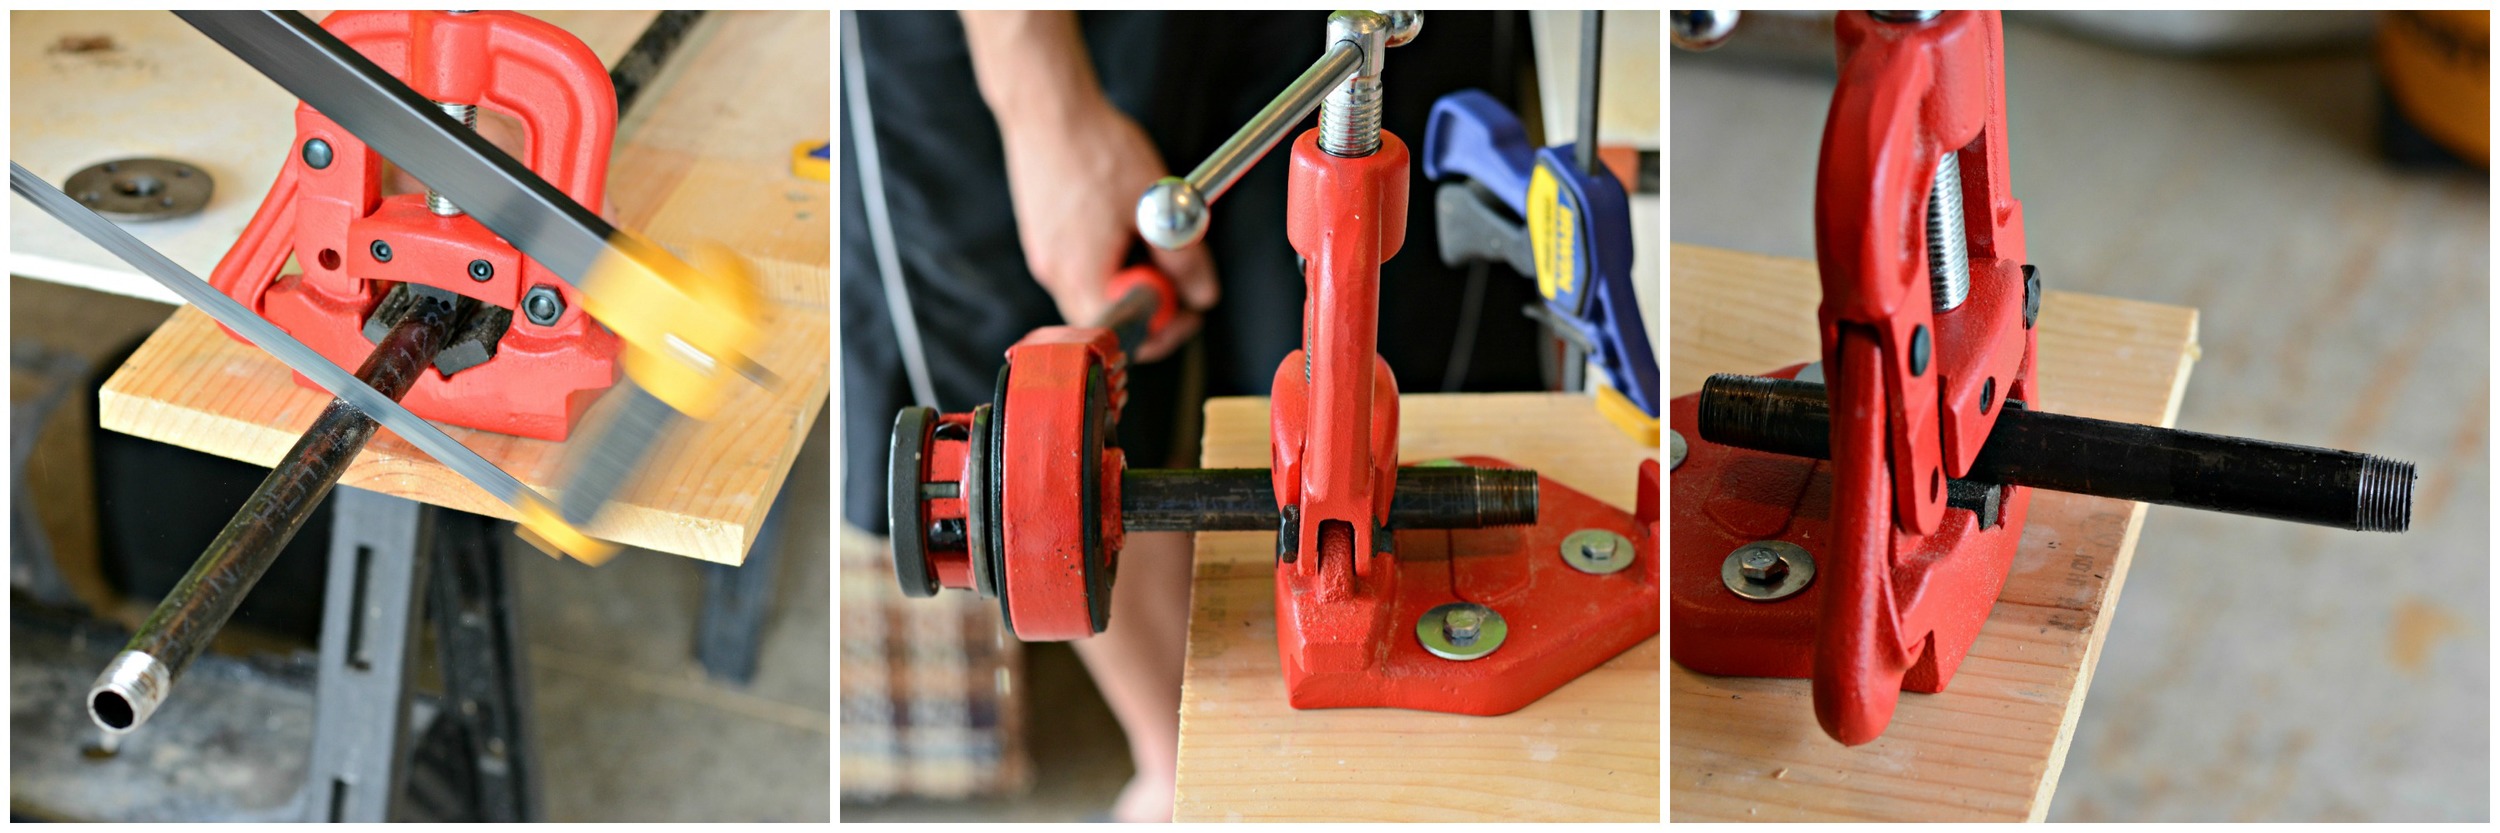
We attached a flange to one end of the cut pipe and a cap to the other end. (These pieces plus the pipe are found in the plumbing aisle.)

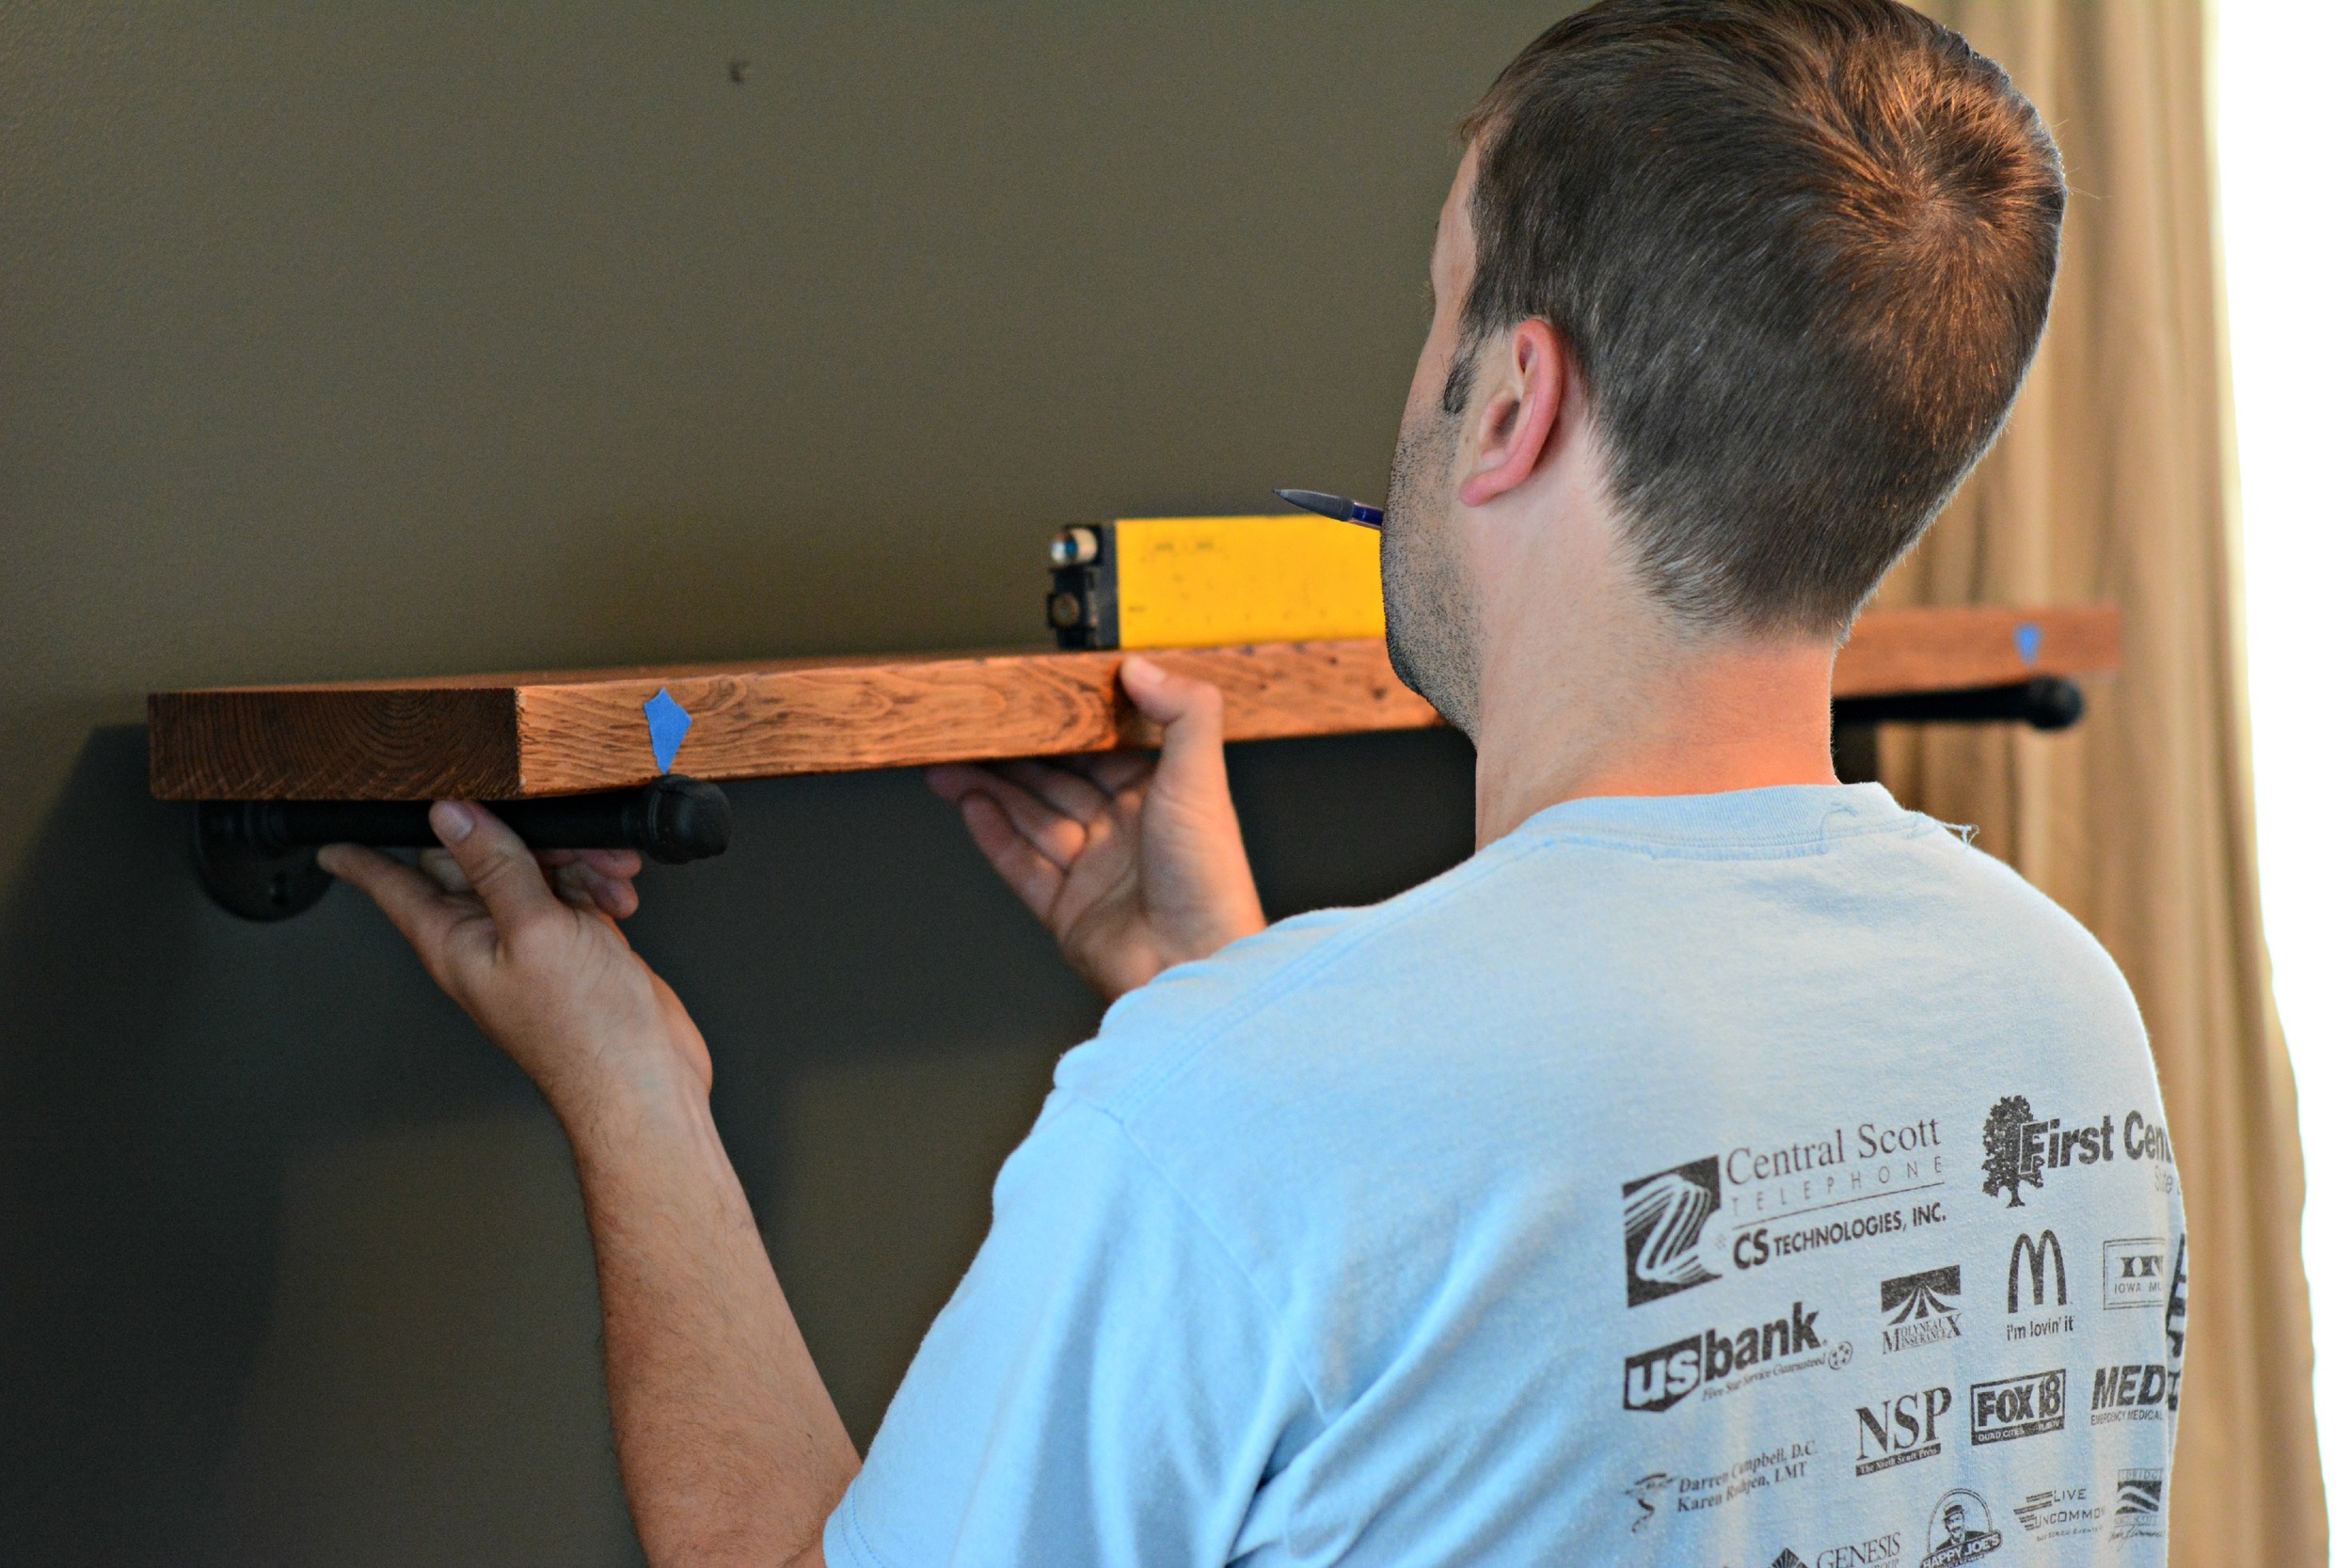
Start by placing the pipe unit at the height you want for your shelf. Use a pencil to mark each circle where you will drill holes for screws.

Drill 4 holes in the marked location using your fancy new BLACK+DECKER Autosense drill. (Bedhead optional.) We placed a vacuum hose under the drill to catch the drywall dust.
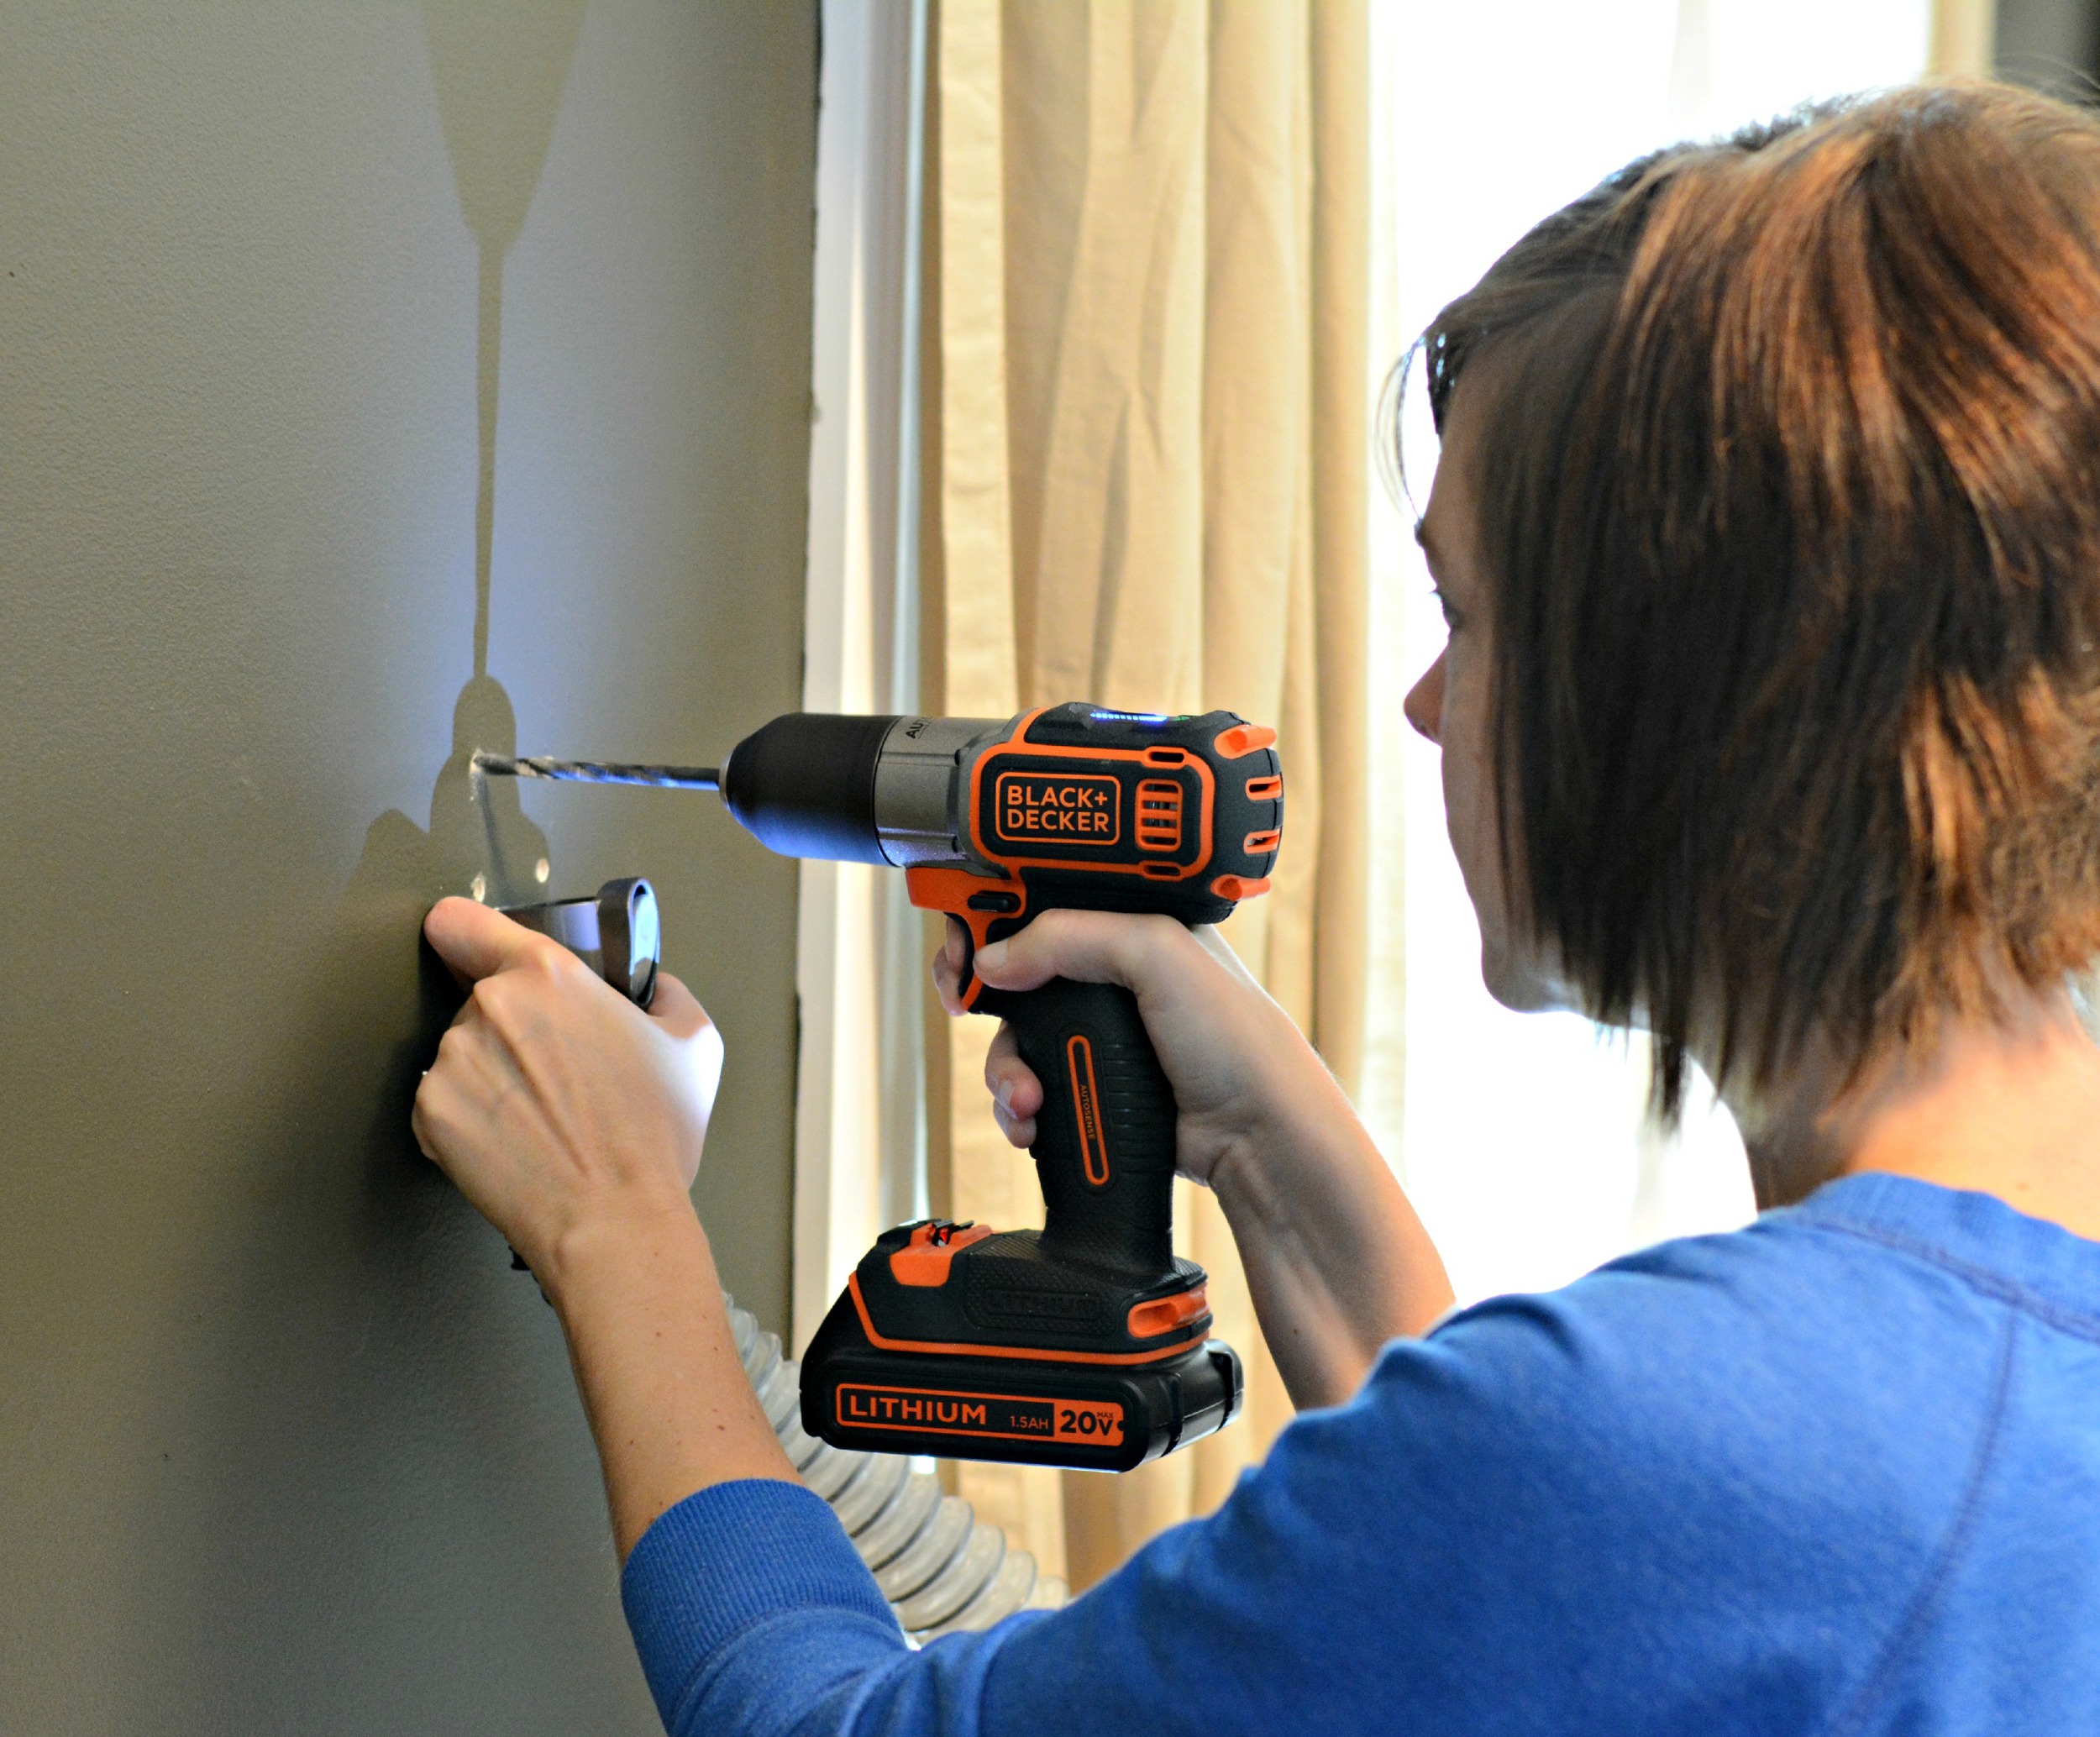
This drill is pretty sweet (not just because it's a sponsored post). I'm not super coordinated with power tools. I'm trying to learn but most of them are too heavy for my weakling self. The AutoSense drill is lightweight and slim, yet feels really solid.
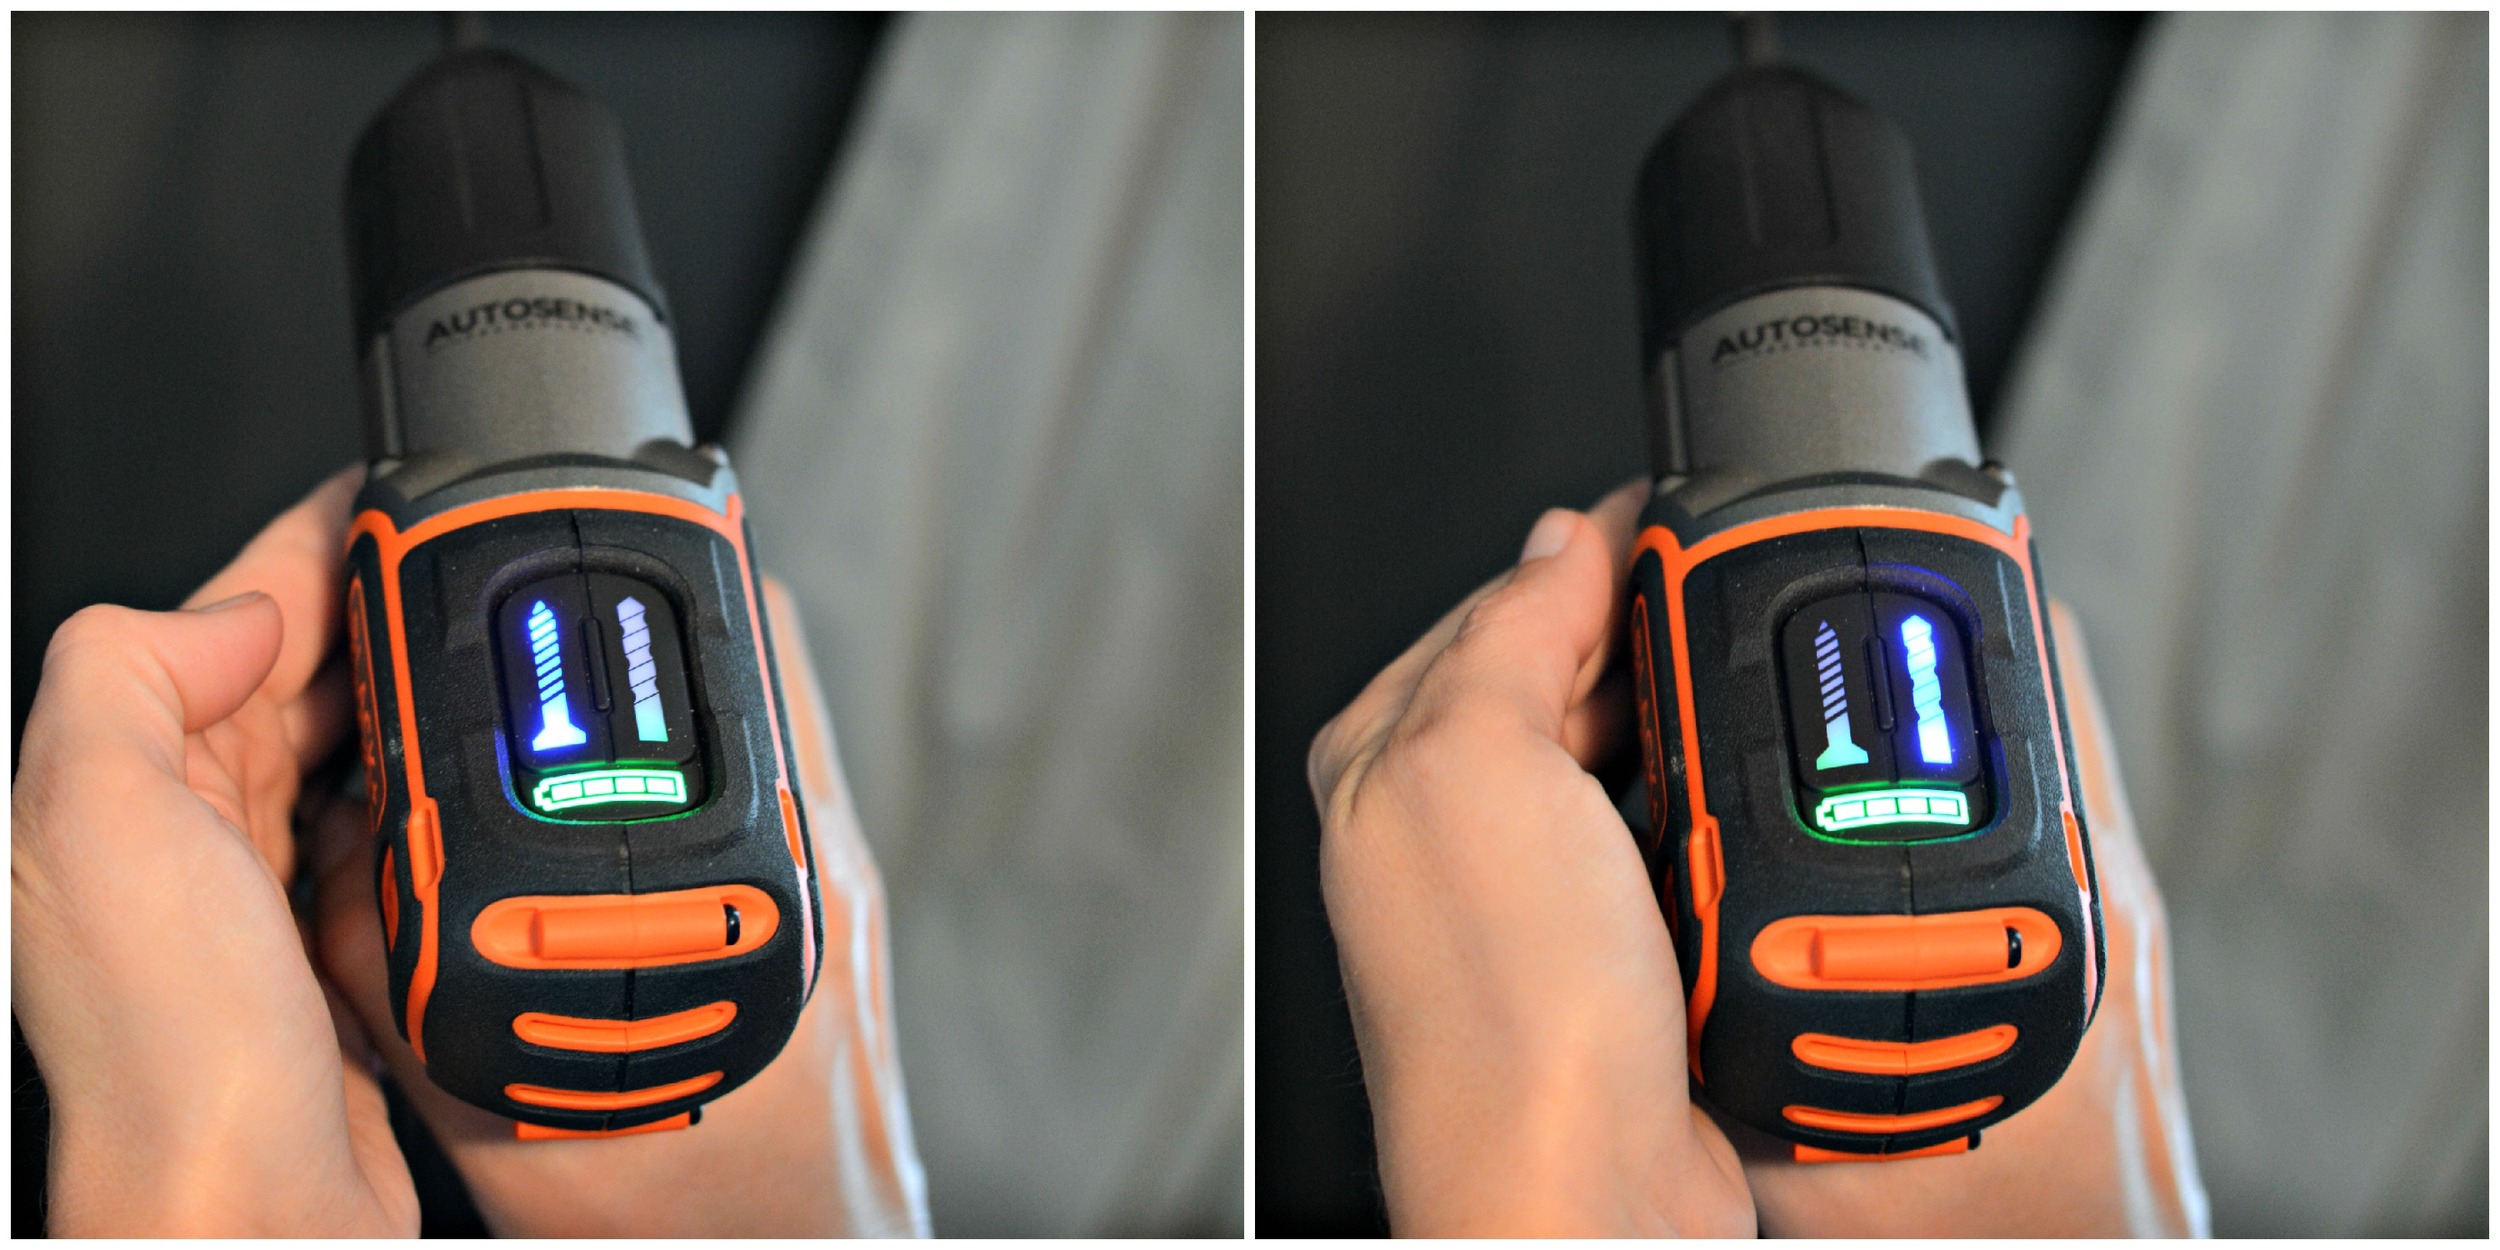
I like the fancy light up buttons for drilling or screwing.
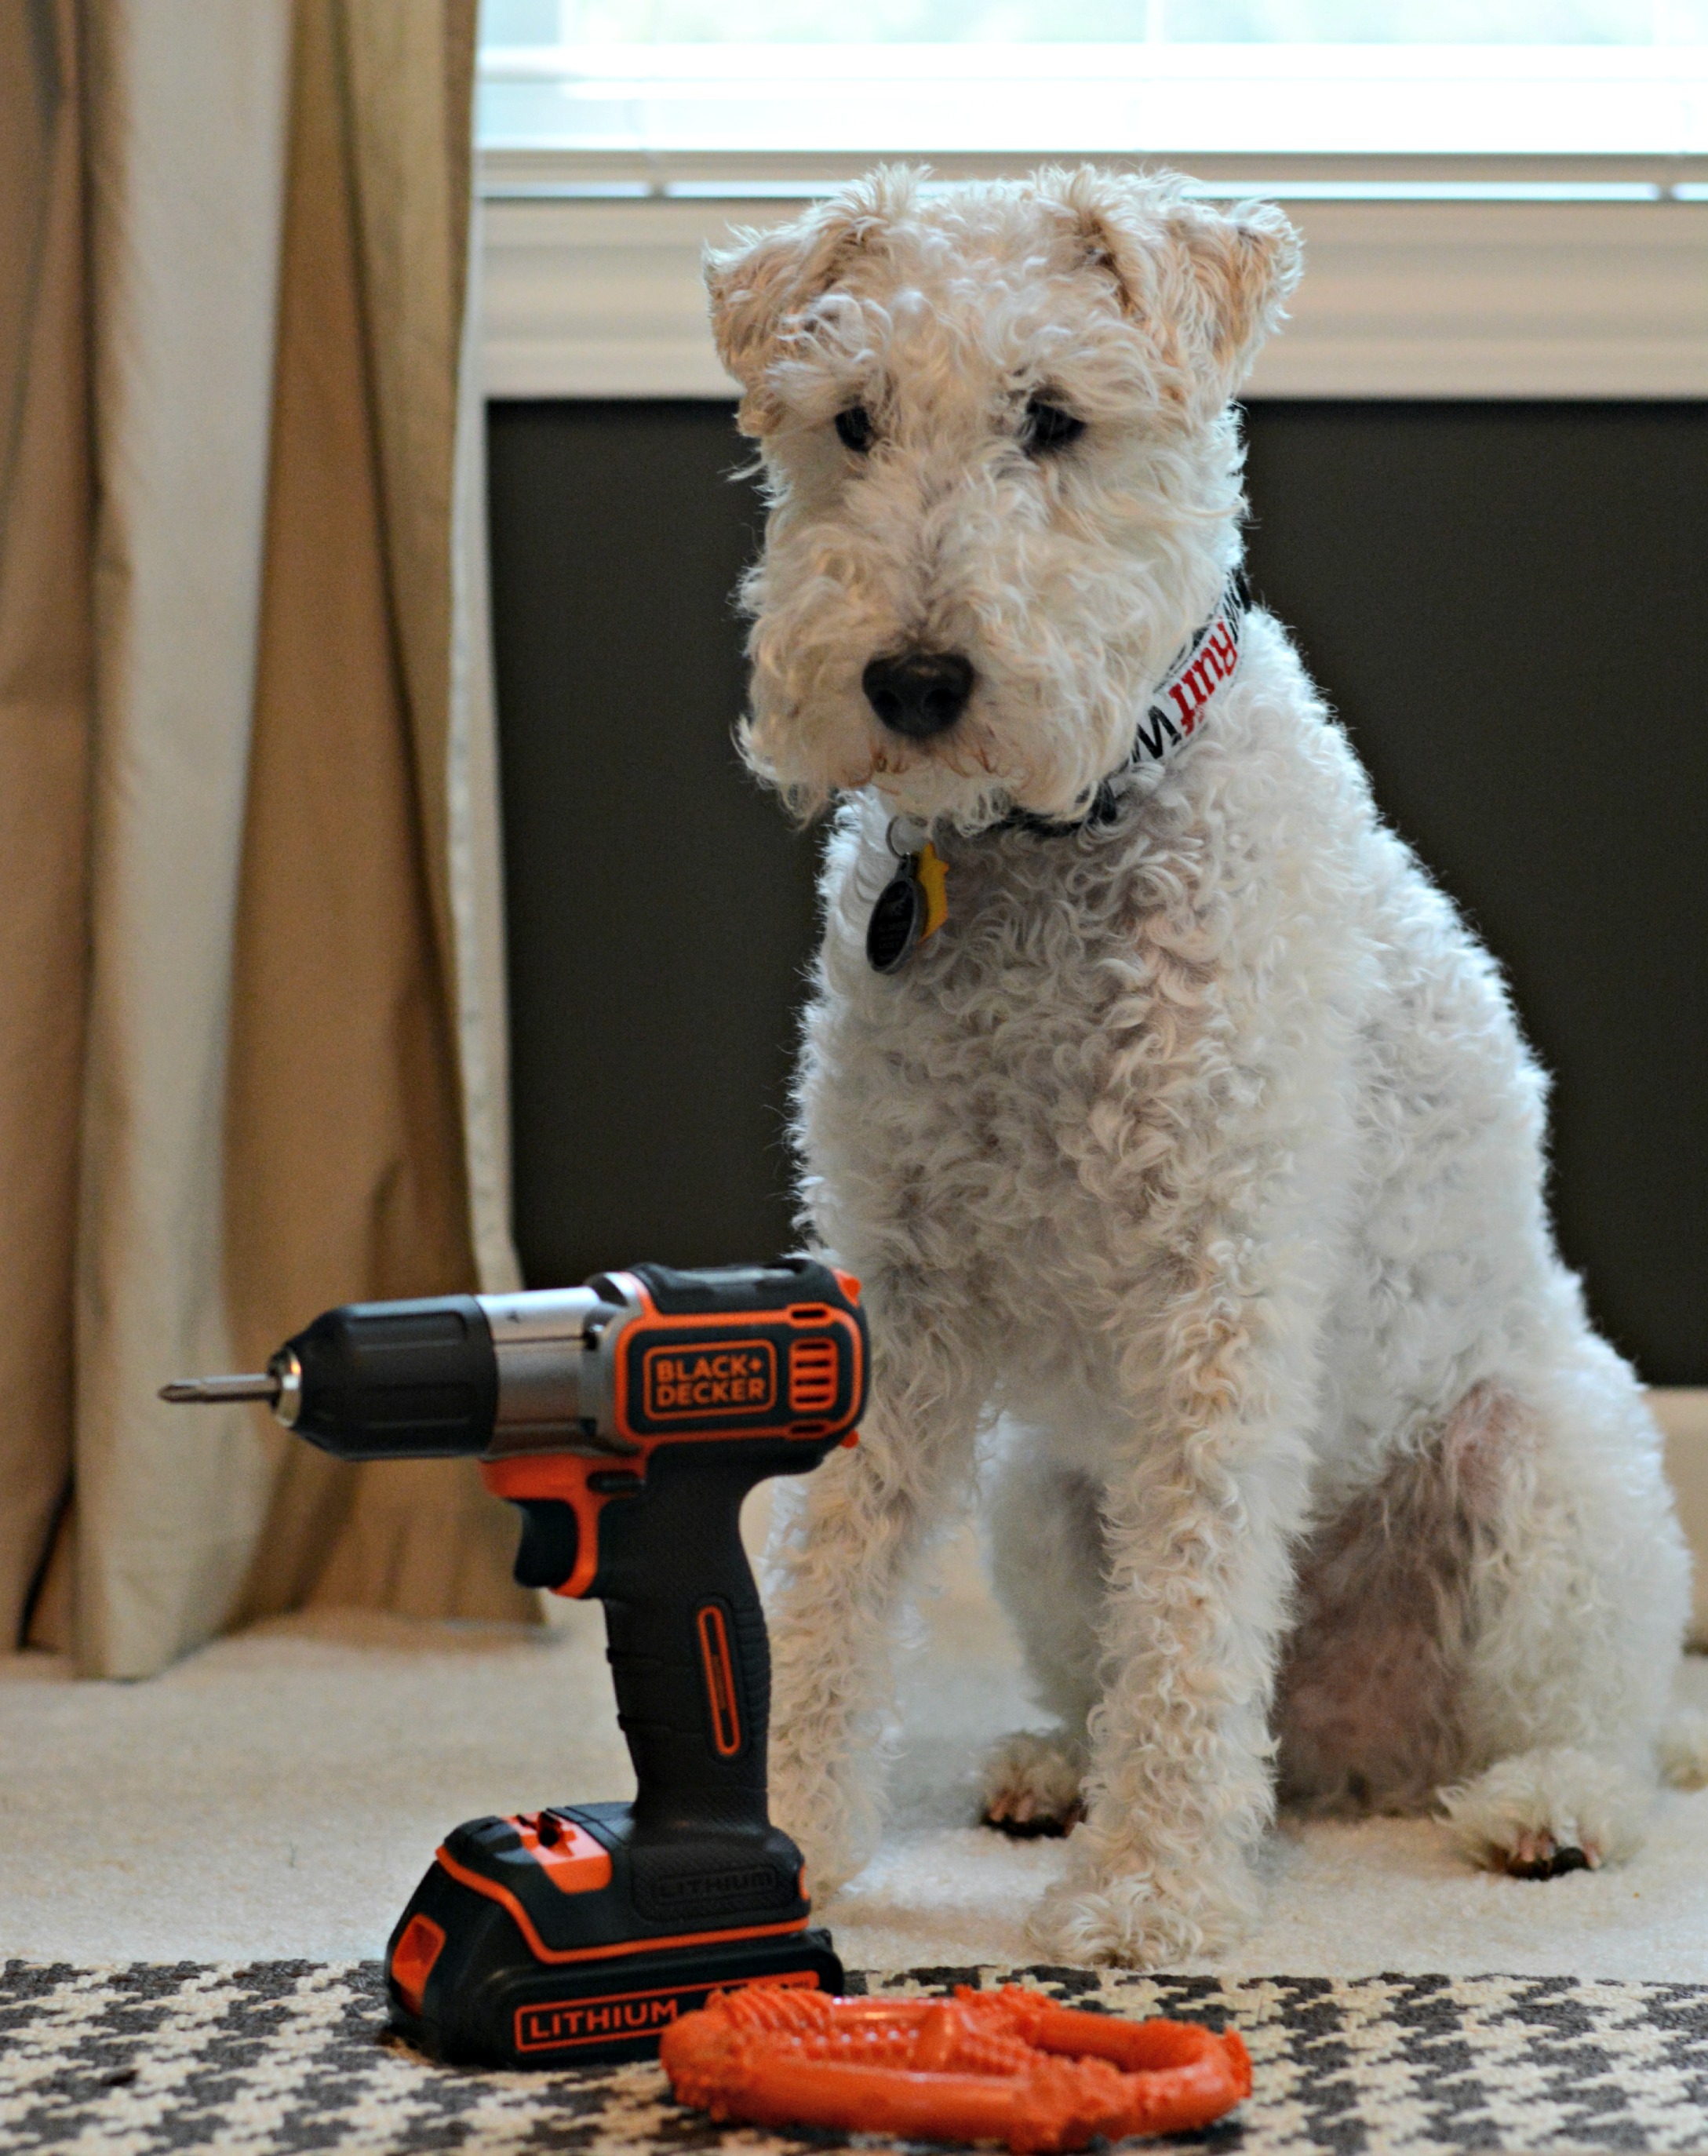
Ike liked that the AutoSense drill matched his favorite chew toy. (Surprisingly not staged.)
Install wall anchors into the drilled holes. Cheesy smile optional.

Use screws to attach piping unit to the wall. The BLACK+DECKER Autosense drill is awesome because it has an automatic clutch that monitors the amount of torque needed to drive the screw. This autosense feature is awesome for a newbie power tool user like myself. I have made huge wall goobers before with other drills. This one stopped at just the right time. Nate let me tackle this part of the project on my own. I'm such a big kid these days.

After the piping unit is installed, mark 3 3/4" inches from each end (or whatever looks good) of the board with painter's tape. Rest board on installed pipe unit making sure painter's tape is located in the center of that unit. Use a level on top of the board to help determine the placement of the second unit. Mark holes and repeat above steps.
Repeat for number of shelves desired.
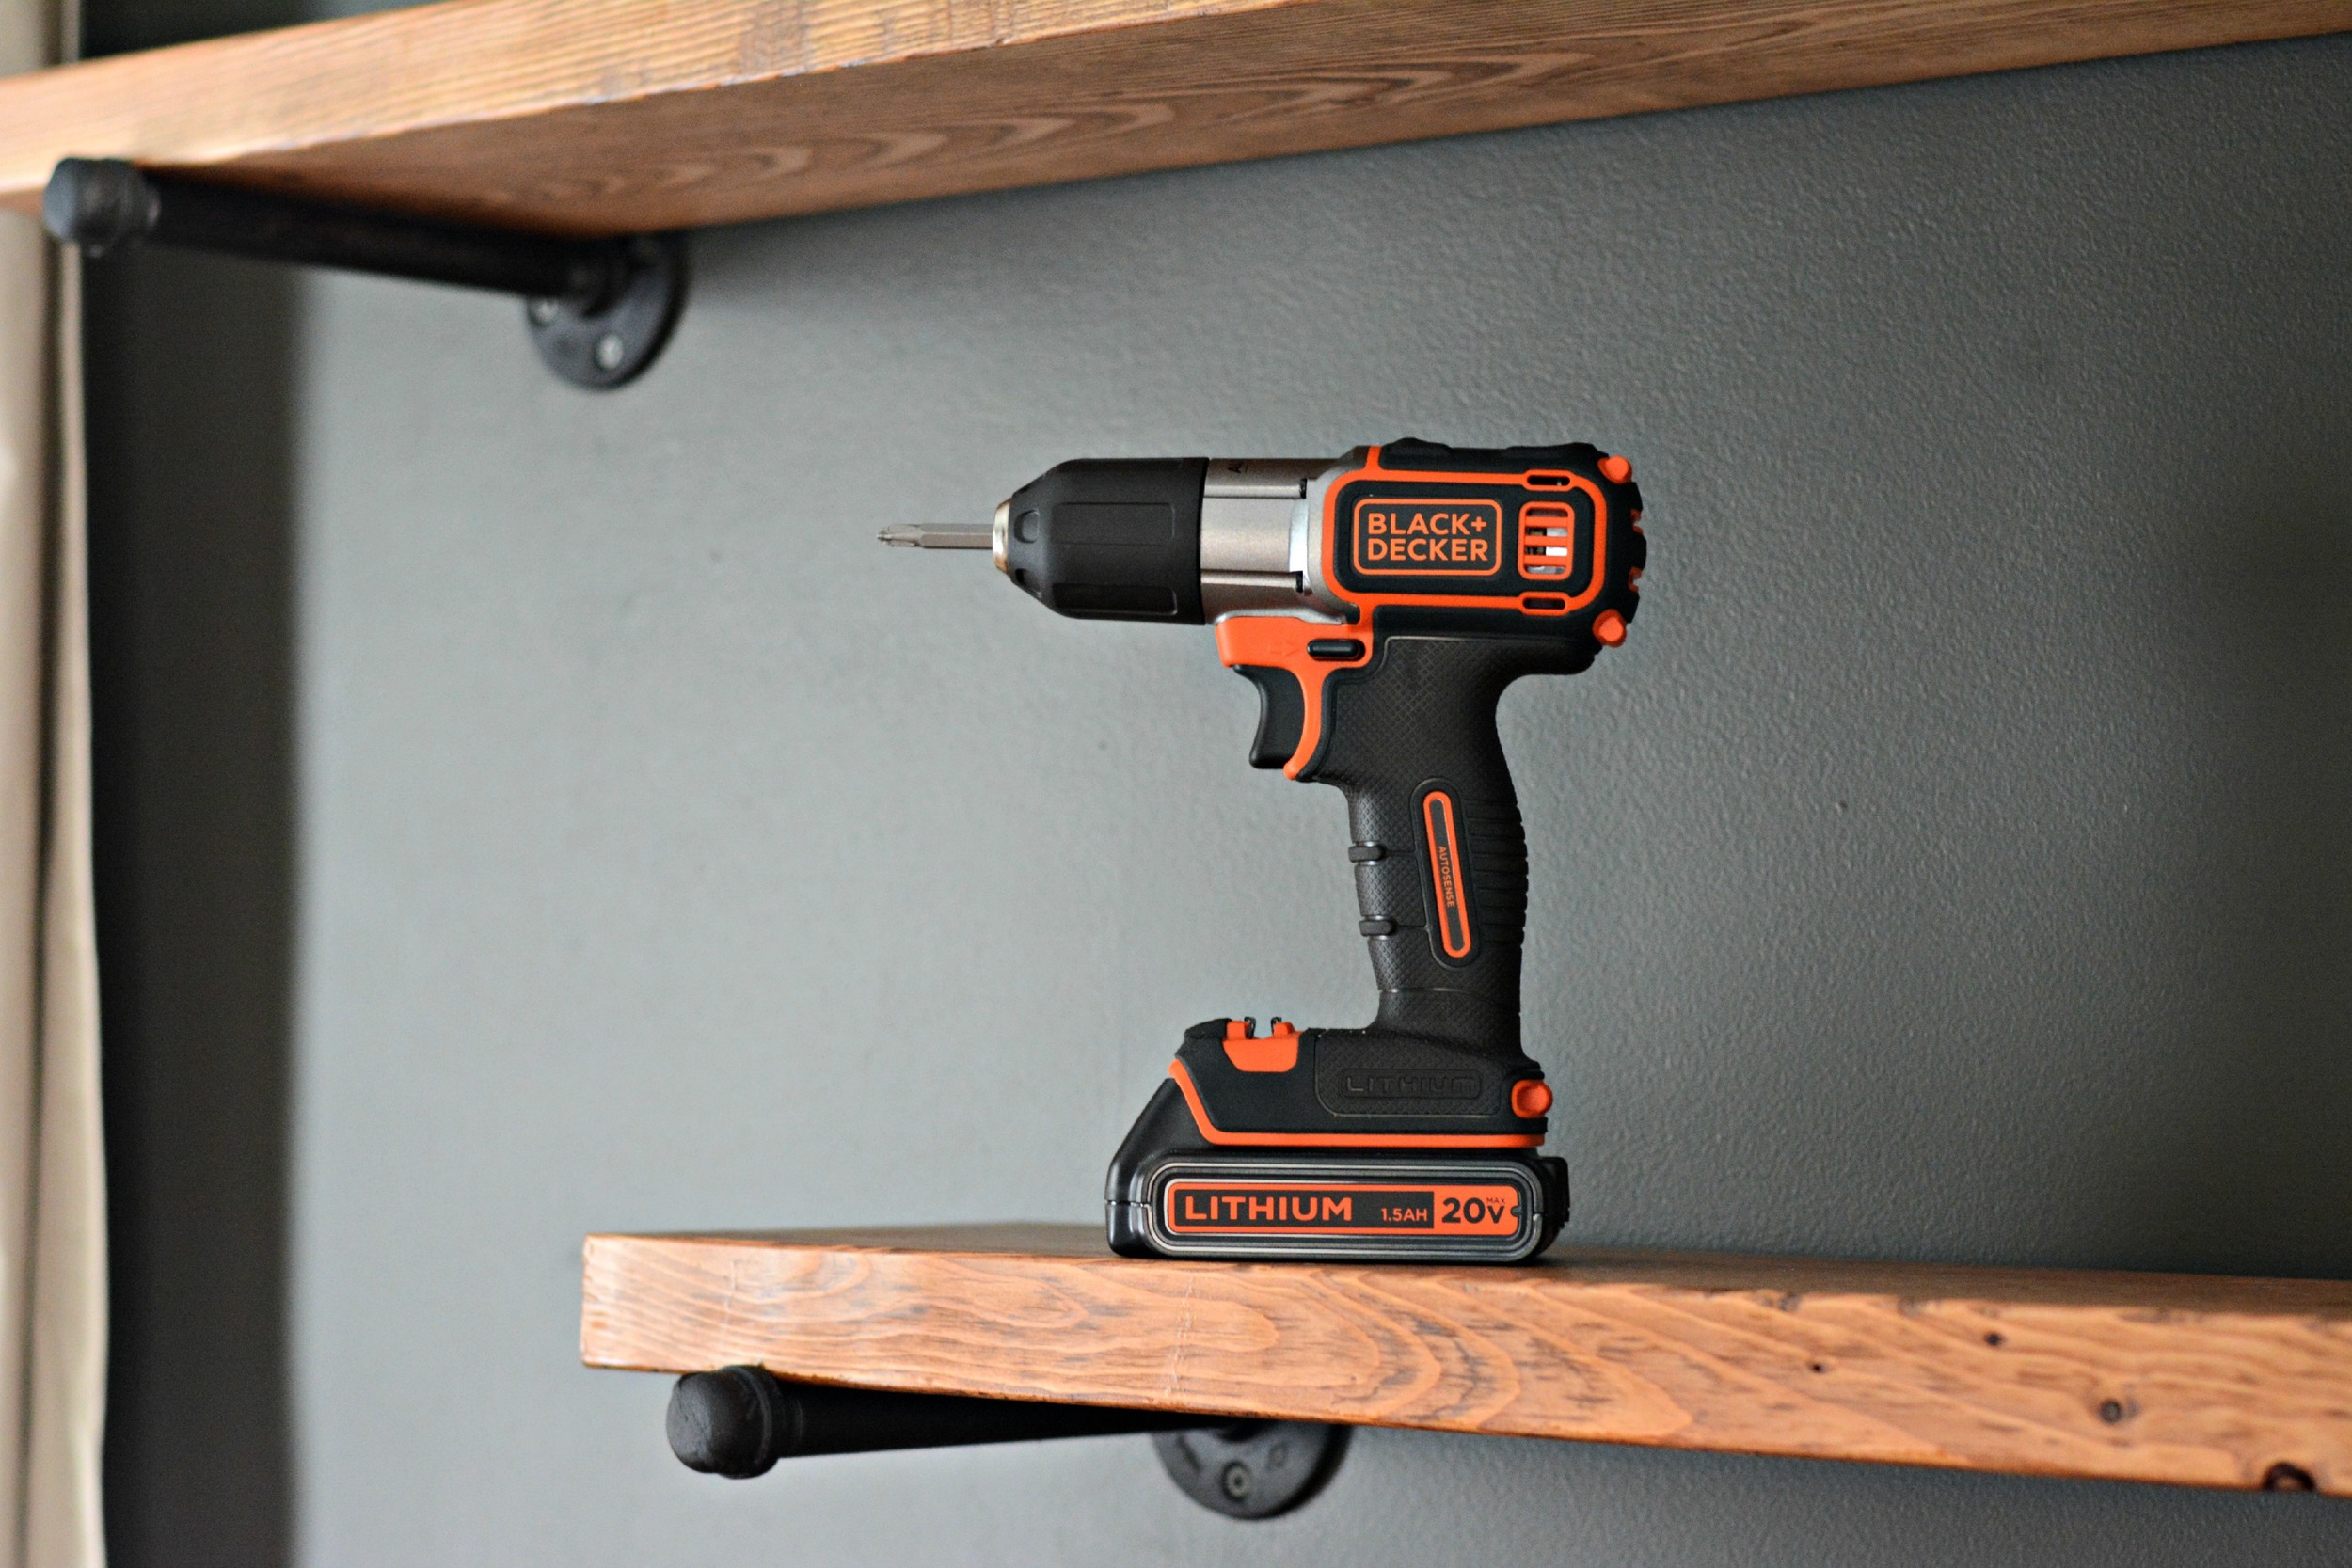
Awesome industrial shelving completed. Pretty easy, right?


We were having some problems with lighting inside for a video (darn amazingly dark walls and gloomy weather). We stepped outside for a quick video to show you all that I am now the master of power tools and cheesiness. (FYI: the yappy dog is not Ike.)
The Autosense stop feature is seriously so cool. I tried to learn how to use an automatic screw drill while building our card catalog cabinet. Nate kept taking the drill away from because I would goober up the wood by drilling too far or just bounce the drill around. This autosense business is like magic. Look at me go.
Now for the exciting news. I'm giving away one BLACK+DECKER 20V MAX* Lithium Cordless Drill/Driver with Autosense Technology to one of you!
How do you enter? Visit the BLACK+DECKER site. Leave a comment telling us your favorite feature of the Autosense Drill and how that feature would help you tackle your next project!
***Giveaway open to US Residents only. Ends June 30, 2014***
Many thanks to BLACK+DECKER for sponsoring today's story and introducing me to the AutoSense Drill and its automatic clutch!


