DIY Curtain Rods
/Why are curtain rods so expensive? It’s a piece of metal for crying out loud.
Wal-Mart is usually my go-to curtain rod source. Gasp. I can’t believe I said the “W” on this blog. What can I say? I’m cheap.
I wanted
to avoid a trip to Wal-Mart
something a little nicer for our bedroom. I soon realized nicer equaled A LOT more money because we needed 3 rods…one of which was pretty long.
I then ran across a few tutorials on how to make curtain rods for little $$$. (Read those tutorials
and
. This is not our original idea. Our tutorial is a combo of those tutorials with our own tips added in…especially with regards to a bay window)
Curtain rods for less. Sign. Us. Up.
Nate measured the length of the walls. We wanted the rods to touch to make the curtain rod appear to be one continuous rod for our bay window.

We headed to Lowes and picked up our supplies:
- Two 10’ conduit pipes (1” diameter) ($10.56..we have a little left over)
- Eight 1” conduit straps ($2.56…we used 6 (2 per window))
- Eight 2.5” L brackets ($5.94…we used 6 (2 per window))


We already had :
- nuts and bolts to attach conduit strap to L bracket
- Black spray paint
- Screws and wall anchors to attach the L bracket to the wall
I tried to talk Nate into having someone at Lowe’s cut the conduit for us. The
man
DIYer in Nate came through and he insisted it wouldn’t be hard at home.
We cut the conduit using our measurements and a borrowed pipe cutter from Nate’s dad. It worked. It just took a REALLY long time. I held the rod. Nate used the cutter. He kept saying “We’re getting really close now” and then 20 minutes later 1 rod was cut. (Have someone at Lowe’s cut the pipe for you….)

Nate assembled the conduit strap to the L bracket.

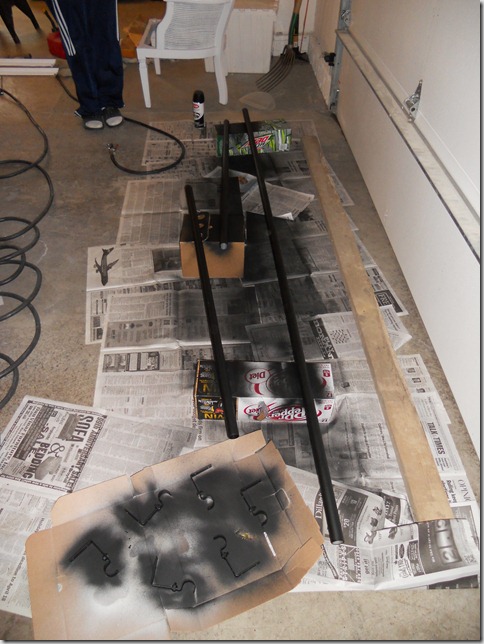
I then spray painted the conduit and hardware. I rested them on a couple of six packs. We are nothing but classy here on Decor and the Dog. I did a light coat. Rotated. Light coat. Repeat. There will soon be a tutorial on how to remove black spray paint from your garage floor…

We let the paint dry overnight.
The next day Nate held the curtains up to determine how high to place the L bracket. He then found the stud in the wall and marked the location for the screws. He drilled a pilot hole and then screwed the L brackets to the wall.

We then placed the curtains on the rod and positioned the conduit rod into the conduit strap.
Wah-lah. Curtains hung.

$19.06 for curtain rods for a bay window. Not so shabby. I priced 3 similar length rods (thinner diameter) at Target and our total would have been between $70-$80….and we would have had that annoying middle strap that always comes with lesser quality curtain rods.
For those of you wanting to try this on your bay window, we recommend purchasing curtains that are not pole-pocket. It’s doable but would be easier with grommet curtains.
Overall, a pretty easy project that saved us quite a bit of cash.
Would we do it again? Absolutely. I know I want curtains in our guest room and we think we have enough pipe left to make it work!
**Edit: Here are some updates from comments we have received…**
Here are what the ends look like…

Our ends just but up to the wall. No finials for us. They will look cleaner when we add crown molding. Note: still gloomy….
Wall color: Poolhouse by Sherwin Williams
Our curtains are purely for looks only. No function. That’s what our lovely blinds are for. Chipping of the spray paint may be a concern if you were to open and close the curtains a lot! Keep that in mind.
The curtains can be removed VERY easily. Just lift the rod from the conduit strap.
Want to see more of the curtains…read yesterday’s post
!
Linking up to:
,


